SPF(supported) (dedicated IP)
DKIM(recommended) (dedicated subdomain)
This article covers the SPF and DKIM authentication processes for Sendinblue and how they are managed in Valimail Enforce. While only one of the two authentication methods is required for an email to pass DMARC, our recommendation is to configure both whenever possible.
With a dedicated IP, you will configure a dedicated subdomain for Sendinblue. This can either be hosted on your DNS or the subdomain can be delegated to Sendinblue.
TABLE OF CONTENTS
- Configuring DKIM authentication for your Sendinblue emails
- Add a Sendinblue DKIM key in Enforce
- Configuring SPF authentication for your Sendinblue emails
Configuring DKIM authentication for your Sendinblue emails
Step 1: Access the Domains page
To access the Domains page:
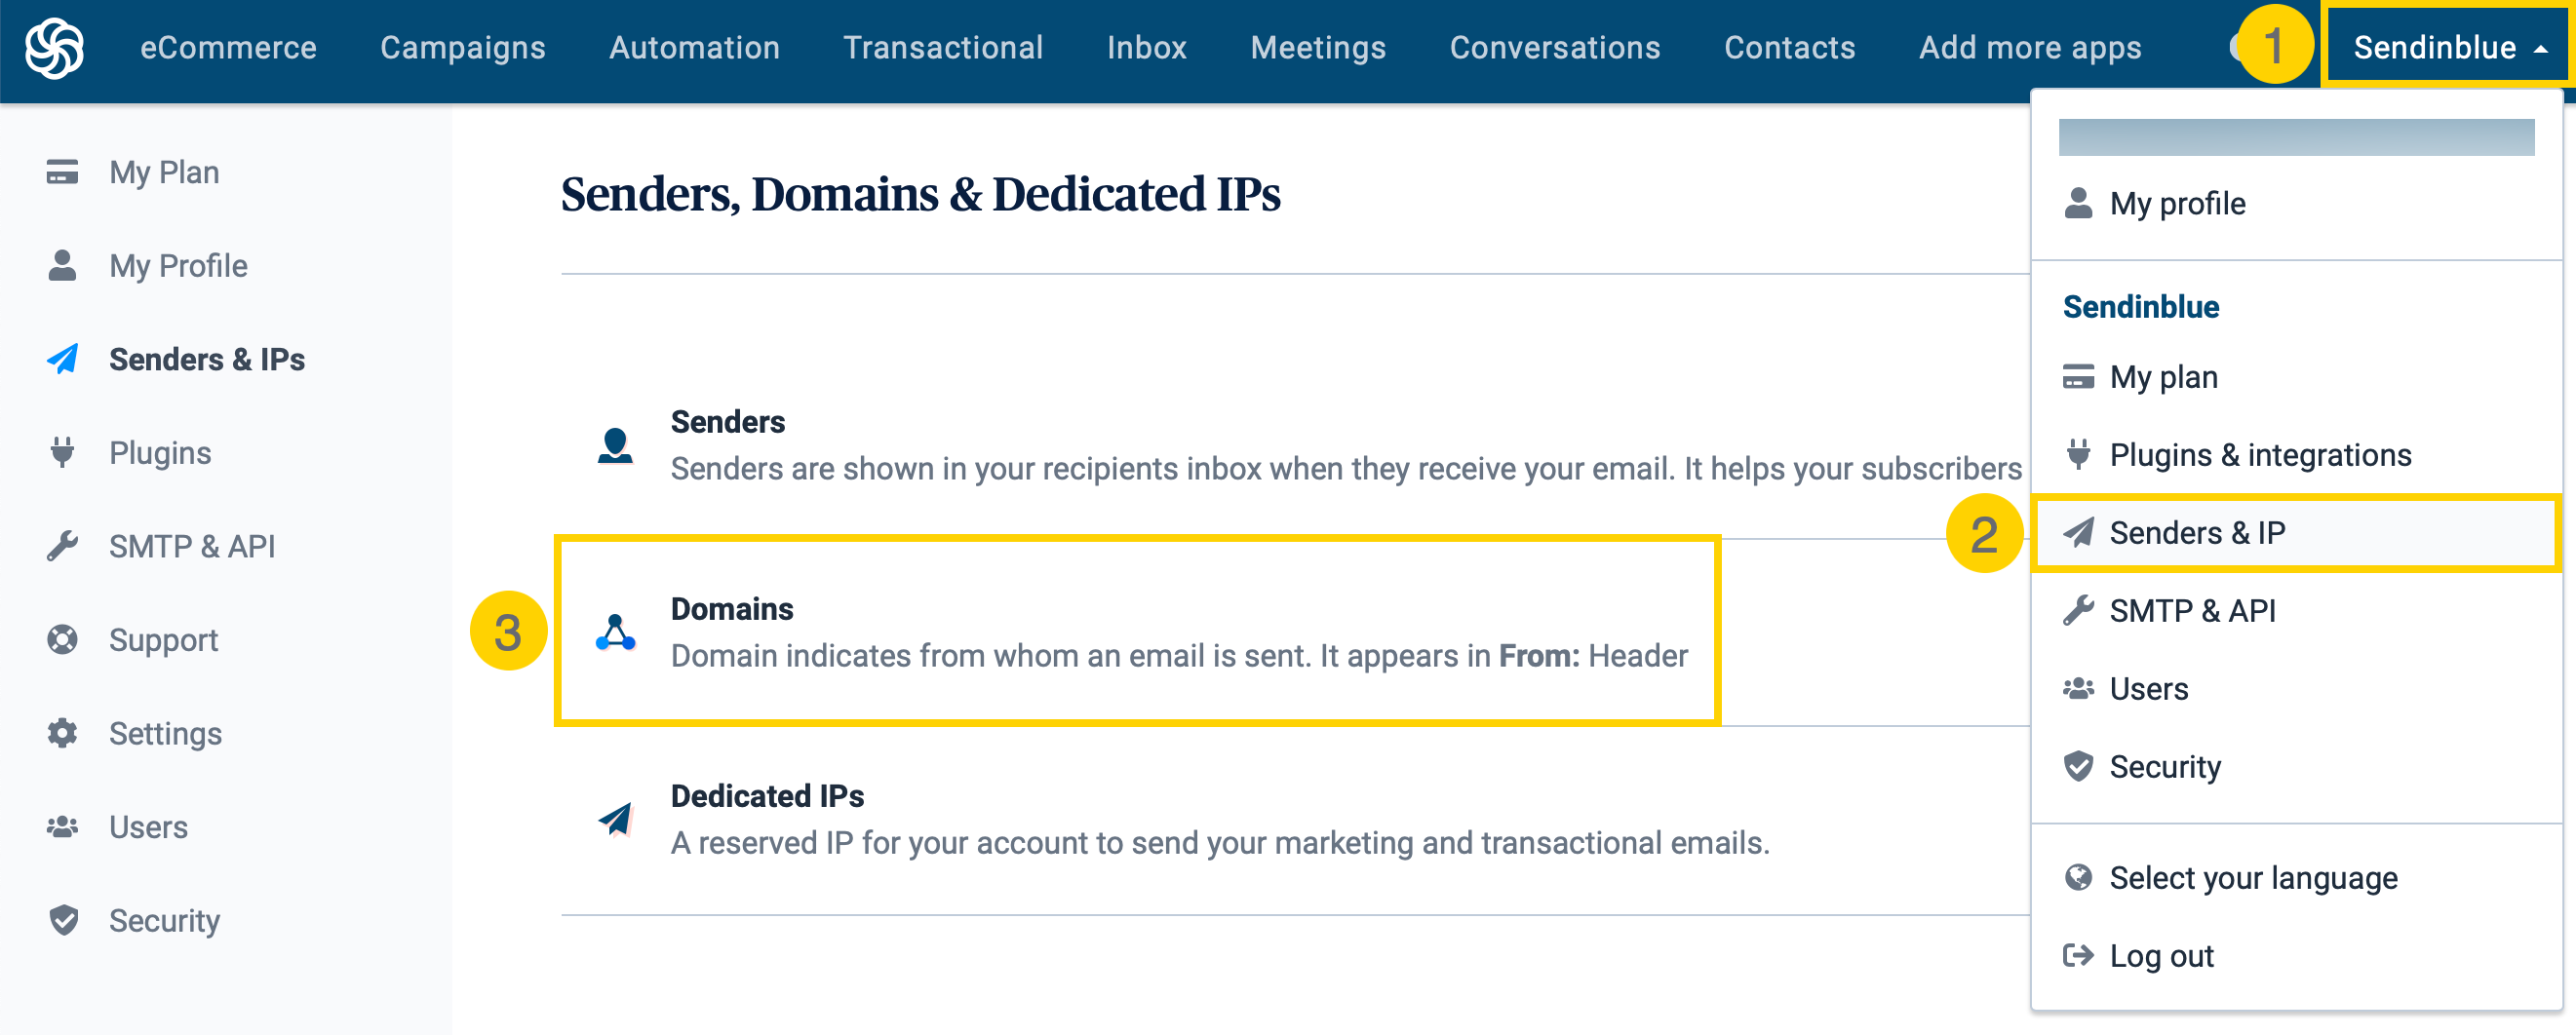
1. In Sendinblue, click on your name at the top-right side of the screen.
2. Select Senders & IP.
3. Click Domains.

Step 2: Generate the DNS records
To generate the DNS records that you will use to authenticate your domain:
1. Click Add a domain.

2. Enter the domain name you wish to use to sign your emails and click Save. In our example, we are using the domain domain.com.

3. The Sendinblue code and SPF will need to be added to your domain host. The DKIM key needs to be added in Valimail Enforce.

4. After you publish the records needed in the DNS and Valimail Enforce, click Verify & Authenticate or Authenticate.
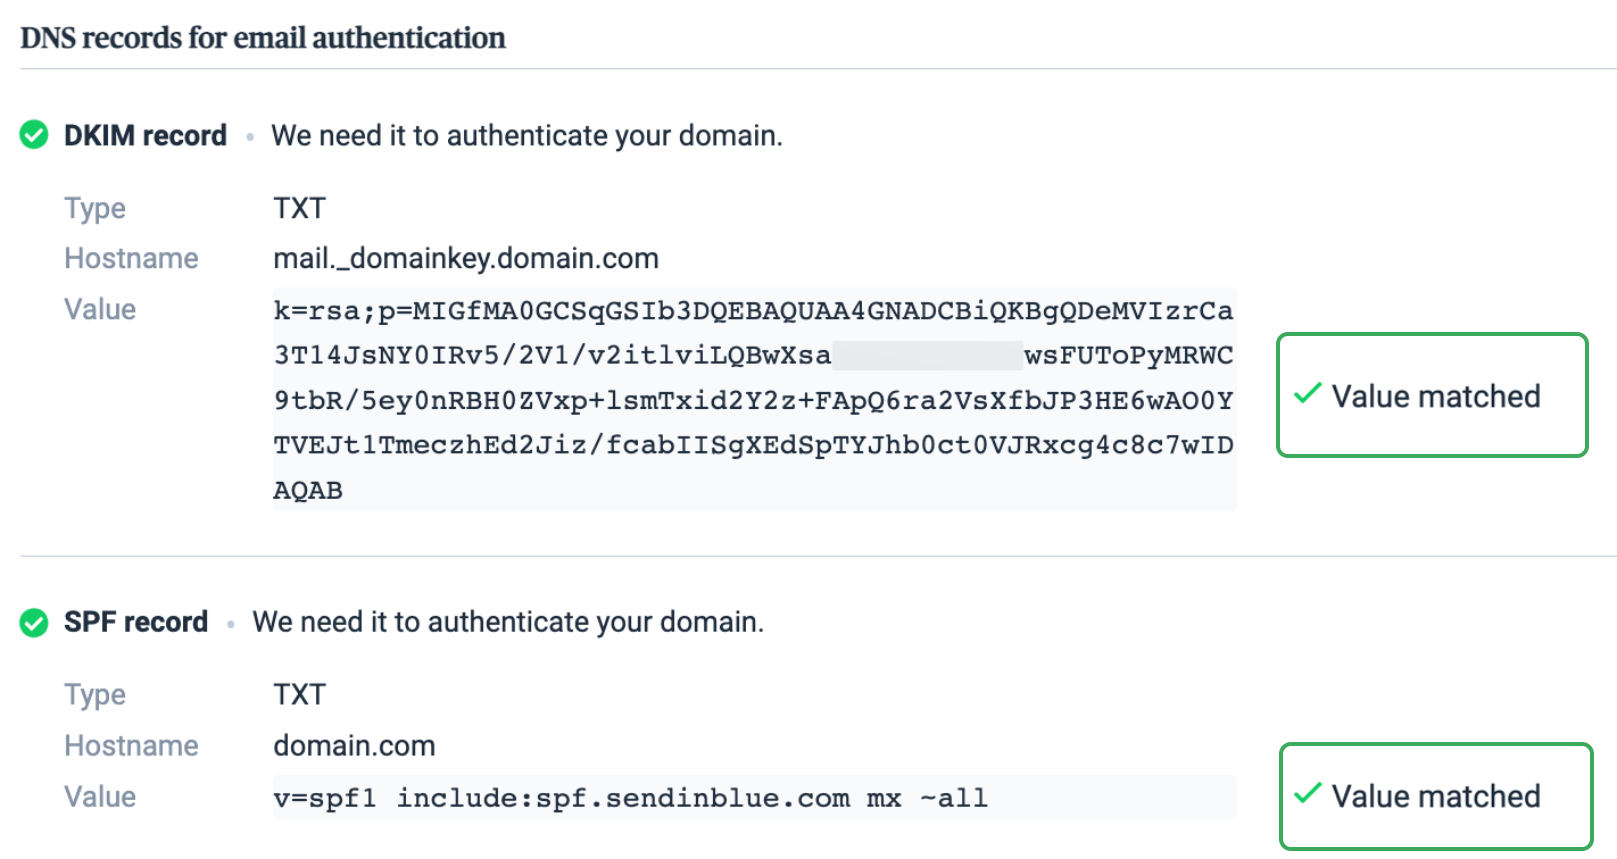
5. Once the configuration is complete, a green check appears next to the Value fields for DKIM and SPF records.

You can find the instructions on how to set up a DKIM key in Sendinblue here.
IMPORTANT: Sendinblue has a verification process that checks to see if a customer has correctly published SPF and DKIM records before they will send in an aligned way. This check is only done when Sendinblue is being onboarded to a domain that is already pointing SPF to Valimail and not when Sendinblue was already configured as a sender in the customer's DNS before pointing SPF to Valimail. Sendinblue does a simple text match for their SPF include and is not able to recognize the Valimail Macros. In order to bypass this, the SPF include for Sendinblue needs to be temporarily added after the Valimail Macro, the record now showing like this:
v=spf1 include:%{i}._ip.%{h}._ehlo.%{d}._spf.vali.email include spf.sendinblue.com ~allThe Sendinblue include can safely be removed once we make sure that the emails are being DKIM signed and that they have verified their include exists.
Add a Sendinblue DKIM key in Enforce
1. Go to your domain's Configuration page in Valimail Enforce and publish the newly created DKIM key.
a. Scroll down and add the two DKIM keys in your configuration, by clicking on Add a DKIM key.
b. Enter the selector name, the DKIM TXT value (the actual value is the entire string after the p= tag), associate the key with Sendinblue and then click Add.


Configuring SPF authentication for your Sendinblue emails
Once you establish that Sendinblue is an authorized sender for your domain, you will need to add the service in your Enabled Senders list in Enforce.
1. Please go to your domain's Configuration page in Enforce.
2. Click on the + sign from the Enabled Senders section:

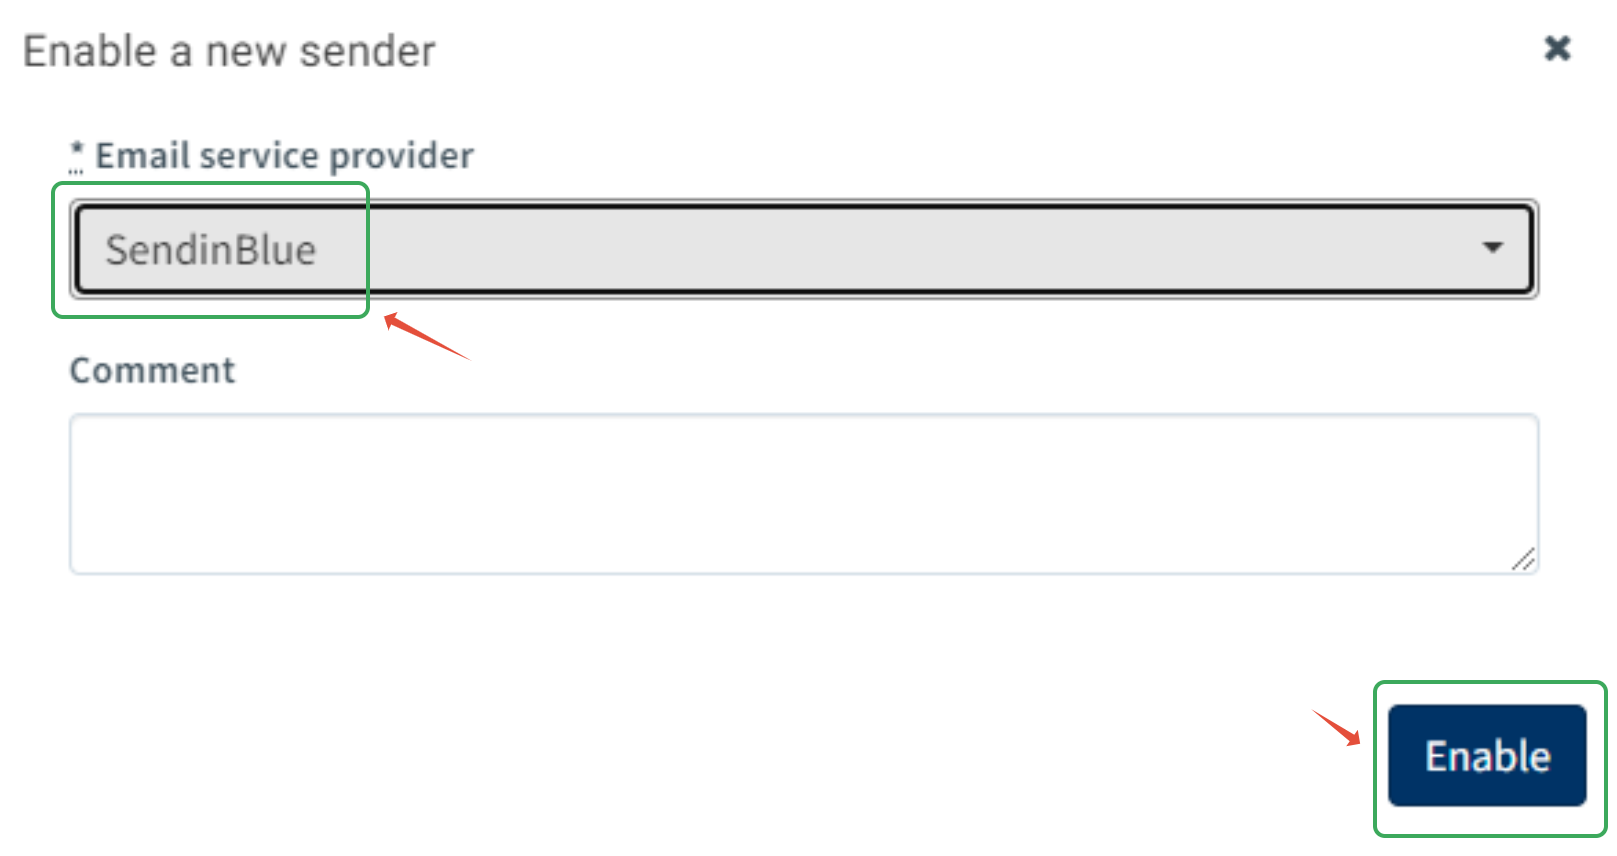
3. Choose Sendinblue from the list of configurable senders and then click Enforce:

We encourage you to use the comment section for any useful information about your sending service, such as the name of the service owner, change request ticket numbers, etc.
As always, if you have any questions, please don't hesitate to submit a ticket.
